





🔋Quick Guide: How to Replace and Test iDryfire Laser Short Flash (LSF) Boresight Cartridge

Quick Guide: How to Replace and Test Your Device Batteries
Whether you are prepping your gear for a busy practice day or setting it up for the first time, keeping your device powered up shouldn't be a hassle. Even if you struggle with small, finicky parts, this quick three-step process will have your device up and running in less than two minutes.
Here is exactly how to change the batteries and test your device to ensure it is working perfectly.
🔋 Step 1: Identify and Stack Your Batteries
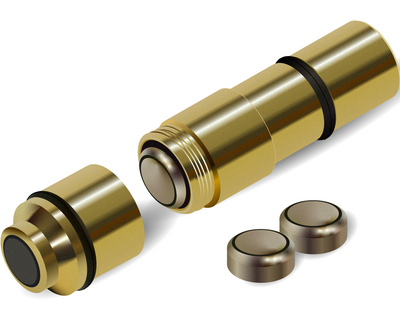
The device requires three LR626 or similar stacked button-cell batteries. To ensure the electrical current flows properly, you must pay attention to how they face:
- The Rule of Thumb: Look for the flat, printed side of the battery (the "+" positive side).
- The Orientation: Insert the first battery with the printed side facing down.
- The Stack: Stack the remaining two batteries directly on top of the first one, always keeping the printed side facing down.
🔩 Step 2: Seal It Up
Once all three batteries are neatly stacked inside the compartment, securely screw the cap back onto the device. Make sure it is tight enough to establish a solid connection, but avoid over-tightening so you don't strip the threads.
🖊️ Step 3: The Ballpoint Pen Test
Before you head out or start using your device, it is always best practice to run a quick diagnostic test to ensure the batteries are sitting correctly. You don’t need any fancy tools -just a standard pen.
- Grab a standard ballpoint pen and click it open so the writing tip is exposed.
- Locate the striking surface on your device.
- Press the tip of the pen firmly down onto the striking surface.
*** You can use your fingernail as well.
The Verdict: If the device triggers or lights up, your batteries are installed perfectly and you are officially ready to go!
Leave a comment